Get Lash Tint Photos That Stop the Scroll
Hello, fellow artists! Priya here. Over my 12 years in the industry, I’ve learned one of the hardest truths: our most subtle, transformative work is often the most difficult to capture on camera. And what service is more beautifully subtle than a lash tint? We see the magic in person—the way it makes the eyes pop, defines the lash line, and gives that effortless, mascara-free look. But translating that magic into a photo that stops the scroll? That’s a different skill entirely.
Let’s be honest: a grainy, poorly lit photo of a lash tint does more harm than good. It fails to show the value of your service and won’t attract the high-quality clientele you deserve. Your social media grid and booking portfolio are your digital storefront. High-quality, compelling photos are what turn a casual scroller into a paying client. Today, I want to walk you through the exact process I use to photograph my lash tint results—no fancy DSLR required—so you can build a portfolio that truly reflects your skill and grows your business.
Step 1: The Pre-Shoot Prep for a Flawless Canvas
A great photo starts long before you ever pick up your camera. Just like we prep the skin for makeup, we need to prep the eye area for its close-up. Rushing this step is the number one mistake I see professionals make.
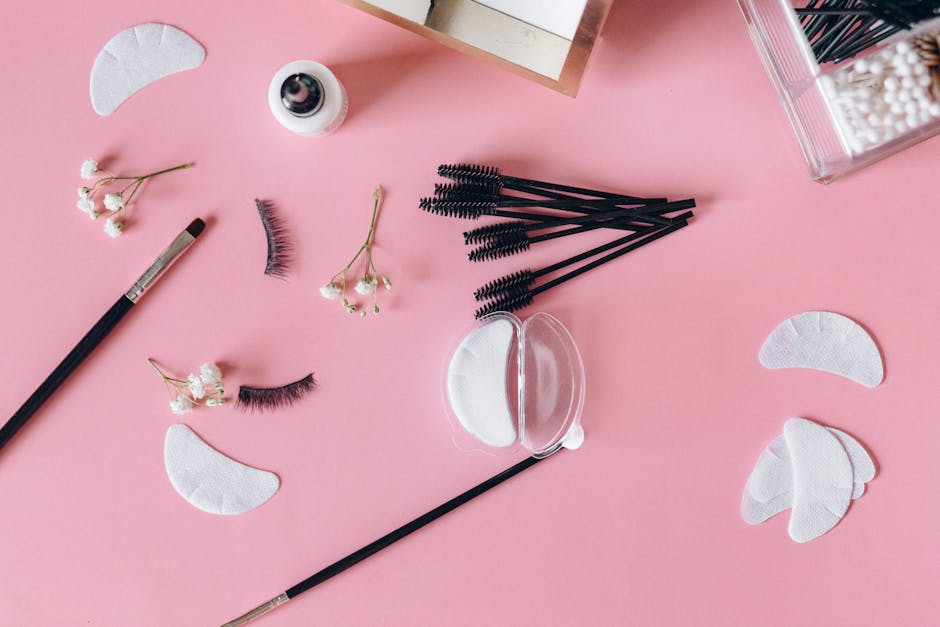
- Clean, Clean, Clean: This is non-negotiable. After the service, ensure the entire eye area is completely free of any residual tint, adhesive, or under-eye pad residue. Use a gentle cleanser on a cotton tip to carefully wipe away any smudges on the skin or eyelid. Check for any stray brow hairs or flaky skin that might distract from the final result. A clean canvas looks professional and puts the focus squarely on the lashes.
- Soothe and Depuff: Often, the skin around the eyes can be a little pink or puffy immediately after a service. I like to keep a set of chilled jade or metal eye rollers on hand. A quick, gentle massage not only feels amazing for the client but also helps reduce any temporary redness, making for a much better "after" photo.
- Brush and Perfect: Take a clean, dry spoolie and gently brush through the lashes. This separates them beautifully, fans them out, and shows off the rich, dark color you just applied. You want every lash to look defined and intentional.
Remember, you are showcasing a professional service. The entire presentation, from the lashes to the surrounding skin, should reflect the quality and care you put into your work.
Step 2: Mastering Light, Angles, and Composition
This is where the artistry of photography comes in. You don’t need to be a professional photographer, but understanding a few key principles will dramatically improve your results.
Lighting is Everything
Harsh, direct overhead lighting is your enemy. It creates unflattering shadows and can wash out the subtle details of the tint. Your best friend? Soft, diffused light.
- Natural Light: Whenever possible, position your client facing a large window. This provides beautiful, even light that illuminates the eyes without creating harsh shadows. Have them sit a few feet back from the window for the softest effect.
- Ring Light: If natural light isn’t an option, a ring light is a fantastic investment. The key is to use it correctly. Don’t just blast it directly at your client’s face. Position it slightly above their eye line and experiment with the brightness and color temperature. I find a neutral-white setting (not too yellow, not too blue) mimics daylight best and shows the true color of the tint.
Find Your Best Angles
A single, straight-on photo isn’t enough to tell the whole story. You need a variety of shots to showcase the transformation from every perspective.
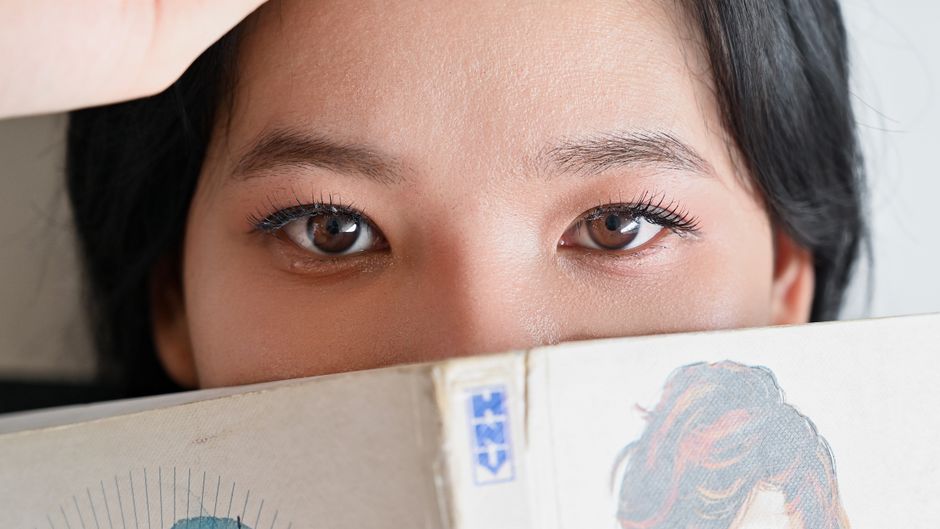
- The Straight-On "Before & After": This is your money shot. Take a photo of one eye before the service and the exact same photo after. The consistency is crucial. Have the client look straight ahead into the camera. This clearly demonstrates the darkening effect and the illusion of added length.
- The 45-Degree Angle: Ask your client to turn their head slightly to the side but keep their eyes looking at the camera. This angle highlights the curl and definition along the entire lash line.
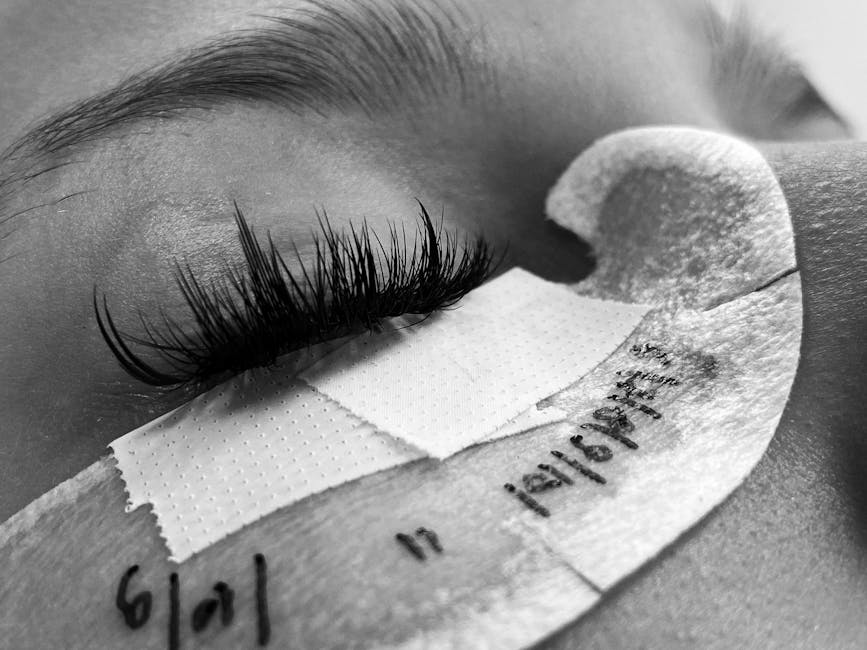
- The "Looking Down" Shot: This is my favorite for showing off the full length and richness of the tinted lashes against the skin of the eyelid. Have the client gently close their eyes or look down towards their lap. It creates a beautiful, serene image that feels very editorial.
Pro Tip: Use your phone’s focus feature! Before you snap the picture, tap on the screen directly on the client’s lashes. This tells the camera exactly what to focus on, ensuring the lashes are crisp and clear while the background is slightly softer.
Step 3: The Simple Gear That Makes a Big Difference
You can absolutely achieve professional-grade photos with the smartphone in your pocket. It’s all about a few small, strategic additions to your toolkit.
- A Modern Smartphone: Any recent model from the last few years will have a camera that’s more than capable. Learn to use its "Portrait Mode" for a soft, blurred background, but use it sparingly, as it can sometimes blur the tips of the lashes.
- Clip-On Macro Lens: This is a game-changer and my number one recommendation. A macro lens for your phone costs very little online and allows you to get incredibly detailed, close-up shots without the photo becoming blurry or pixelated. This is how you capture those stunning images where you can see every single, perfectly tinted lash.
- A Simple Backdrop: A busy, cluttered background is distracting and looks unprofessional. You don’t need a full studio setup. A clean, plain wall works perfectly. You can also purchase a piece of velvet fabric or a textured photography board to have your client rest their head against for a more luxurious feel.
Step 4: Editing, Captions, and Turning Photos into Bookings
Your work isn’t done once you take the photo. The final polish and how you present it online are what will ultimately drive business growth.
Subtle Editing is Key
The goal of editing is to enhance reality, not create a fantasy. Over-filtering or smoothing the skin to an unnatural degree screams "inauthentic" and erodes client trust. Instead, focus on simple adjustments:
- Brightness & Contrast: Slightly increase the brightness to make the photo pop and adjust the contrast to make the dark lashes stand out against the skin.
- Sharpening: Use the "sharpen" or "structure" tool very slightly. Apply it only to the lashes themselves to make them look extra crisp and defined.
- Color Correction: If your lighting was a bit yellow, use the "warmth" or "temperature" slider to cool it down for a more true-to-life skin tone.
Free apps like Snapseed or the built-in editor on your phone are perfect for these minor tweaks.
Crafting the Perfect Post
A great photo needs a great caption. Don't just post the picture with #lashtint. Tell a story! Explain the benefit. For example: "What a difference a tint makes! We gave this lovely client’s naturally light lashes a boost of rich, dark color. Now she can wake up with defined eyes, no mascara needed. Perfect for vacations, workouts, or just a low-maintenance routine."
A polished feed filled with high-quality work is your best marketing tool. It builds trust and makes it easier for potential clients to find and book you, especially when you use a streamlined system like REZVA that lets you showcase your portfolio right on your booking page. When your work looks this good, you want to make booking your services as easy as possible.
Conclusion
Photographing a lash tint isn't just about taking a picture; it's about capturing the value you provide. It’s visual proof of your skill and the confidence boost you give your clients. By focusing on a clean prep, mastering your lighting and angles, and applying a light touch in editing, you can create a stunning portfolio that works for you 24/7. It will attract your ideal clients, justify your pricing, and solidify your reputation as a top-tier professional in our industry. Now go get that perfect shot!
Frequently Asked Questions
How do I get clients comfortable with having their picture taken up close?
Communication is key! I always ask for permission before the service begins, framing it as a way to showcase my work for my portfolio. I explain that I’ll only be focusing on their eye area. During the shoot, I keep it quick, give clear and gentle instructions ("Can you look down toward your lap for me? Perfect!"), and show them the photo afterward. Making them part of the process builds trust and makes them feel more like a collaborator than a subject.
What's the best way to show a "before" photo without making the client's natural lashes look bad?
It's all about the language you use. Never describe the "before" state with negative words. Instead of "look how sparse her lashes were," focus on the "after." Use positive, benefit-driven language. For example: "Here’s a look at the beautiful transformation. We enhanced her lovely natural lashes with a deep black tint to give them incredible definition and depth." You're celebrating the enhancement, not critiquing the starting point.
Should I watermark my photos?
This is a personal business decision. A large, obtrusive watermark can be distracting and take away from the beauty of the photo. However, content theft is a real issue. If you choose to use one, I recommend a small, semi-transparent logo or your Instagram handle placed discreetly in a corner. It should be present enough to credit you but subtle enough that it doesn't overpower your beautiful work.
Take lashes & brows bookings online, free.
REZVA helps specialists manage bookings, cut no-shows, and grow their business. Free to start, no booking fees.